Share Angular libraries with lerna
September 15, 2019
Managing multiple Angular libraries it’s not a trivial task for a developer or a team. How to structure your code not only shape the future of your codebase but also the process that you and your team have to define around it. Many companies are now looking to follow the big software companies and using monorepositories. I’ve blogged already on the topic last year here but now that the tooling landscape has changed it is time to revisit my post with a fresher approach.
Angular tooling panorama
Considering when Angular 2 first appeared, the tooling, community and also general knowledge on how to manage Angular projects has changed a lot. The angular/cli team is doing a great job responding to the community needs and including missing features to manage multiple projects.
A clear example of this is the possibility to generate and manage Angular libraries directly through the cli. Using ng-packagr, behind the scene, we can now create and build shared libraries between projects in a single repository.
Another good example of how things are changed from was we started, is the great contribution that the NRWL team is providing by providing new ways to manage not only Angular applications and libraries, but also backend projects in a single repository.
Organisation needs
Deciding how to structure the codebase of a project, or of an entire company is not an easy task. The number of conventions and different process that vary between teams can be daunting. Trying to change existing codebases is even more difficult, where we can encounter developers friction.
The Angular team doesn’t enforce any specific practice managing a monorepository, giving the freedom to the developers to architect around their their needs. NRWL, an open source toolkit to manage monorepository, on the other hand, is more opinionated. The main idea behind using NX is that all the people working in the monorepo are responsible for keeping all the projects and libraries in sync.
In an ideal world all our libraries and projects should be always updated to the latest version, but in reality, each team is working against a defined backlog and specific stories through the sprint. Taking the responsibilities of updating projects or libraries across all the teams can and probably will have an impact on the capacity of a team, maybe causing delays to deliver some stories.
Another approach is possible, and we have been following it for the past few years in RyanairLabs. We manage a reasonably big monorepository of common components that are shared between all the frontend teams. The repository counts more than 30 different components that vary from simple models shared across applications to more complex libraries to manage the user basket for example.
Common components
The common components inside the monorepository, are included in various projects in the company, from public facing to internal ones. Any team can make changes to the common components and update them and improve them. There’s a strict code review process to ensure high code quality standards and all different developer takes turn into the process.
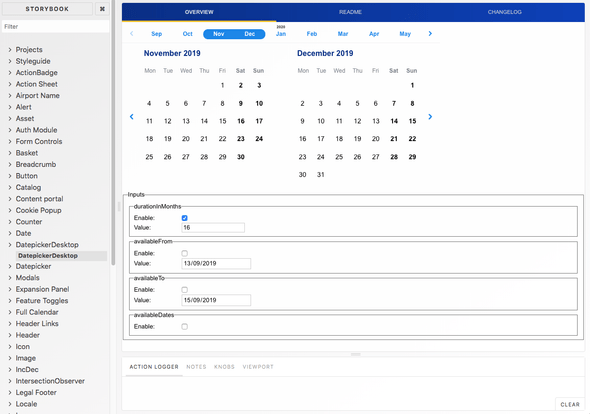
To better understand the components usage, interaction and visual, we are using Storybook and we enforce that each library should have at least one story in the storybook to showcase its functionality.
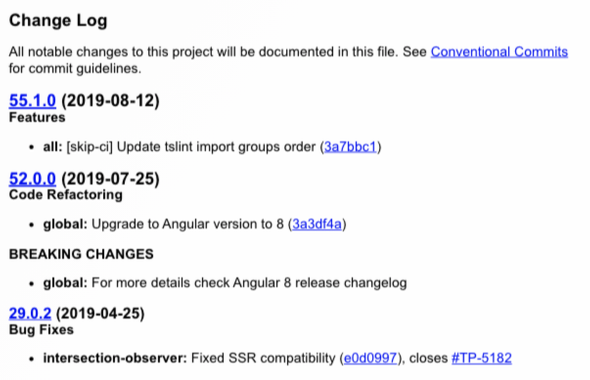
The libraries are then published to an internal npm registry for other projects to install and consume them through yarn or npm. We are following semantic versioning inside the repository to recognise the type changes introduced at any given time and thanks to conventional-changelog the version is calculated automatically by reading the commit message format. Plus generating changelogs, describing what changed in the library to share between the teams.
All the actions in the repository, from managing cross dependencies, detecting changes, running multiple commands to publishing are orchestrated by lerna.
I will walk you through on how to setup a monorepository to manage multiple Angular libraries, similar to the common components that we are using at RyanairLabs. I will use the angular/cli to create the project and lerna to deal with the packages.
Setup
First, we need to create an Angular project through the angular/cli:
ng new angular-monoNow we need to initialise a lerna project.
npx lerna init --independentThe location of the packages and version of the repository are stored into a lerna.json configuration file generated by lerna during the init process. There are two different modes which lerna operate: fixed or independent. A fixed lerna project only has a single version across all of the packages. While with independent version, each package can be incremented independently without affecting other one’s version. By default, lerna uses the fixed mode but we can change our setting by adding the flag —independent during the init command.
Since Angular generates libraries into the projects folder, we need to change the standard configuration file in lerna.json to point to the correct package folder.
{
  "packages": ["projects/*"],
  "version": "independent"
}
Next, we can start generating libraries in the project:
ng generate library first
ng generate library second
Commands
The angular/cli generates the two libraries inside the projects folder and creates all the necessary files to test and build the libraries. Building the libraries require to use the ng build command passing the name of the library that we want to build. Normally we would need to run multiple ng build commands to build all our libraries. Using lerna run instead we can invoke a script on every package. First we need to add the build script on each package.json
{
  "name": "first",
  "version": "0.0.1",
  "scripts": {
    "build": "ng build first"
  },
  "peerDependencies": {
    "@angular/common": "^8.2.4",
    "@angular/core": "^8.2.4"
  }
}
After adding the scripts, when running the command npx lerna run build, both the libraries
are build and the output of our build is in the dist folder.
Running commands across all the packages is very handy but it can become a bottleneck. Imagine once the monorepository start growing and,
the number of libraries increase, which increases also build and
test time. If we are changing only 1 package we shouldn’t have
to rebuild all the packages at once. By adding filtering option
to lerna run command we can filter out packages and invoke
scripts commands only on a subset of packages of our choice:
# run build on all packages that have changed since 'master'
lerna run build --since master

# run build on all packages that have changed since the last tag
lerna run build --since $(git describe --abbrev=0 --tags $(git rev-list --tags --skip=1 --max-count=1))
Versioning & publishing
Part of the publishing process is also bumping the current package version. Determining the next version for a package can be tiresome, especially when you have to remember all the changes that were committed since the past release. Using semantic versioning can help giving a clear indication of the type of changes introduced. The three number format, major, minor and patch gives you a clear system to calculate the next package version.
Manually applying semantic versioning in a repository it means remembering all the changes committed since the previous release and then mentally determine the version. An automated tool like Commitizen can rescue us from this task. Commitizen is a cli tool that generates commit messages following a standard template, the commit messages then are used to calculate the next package version and to generate changelogs. To start using commitizen we need to initialise our repository
npx commitizen init cz-lerna-changelog --save-dev --save-exact
npm i semantic-release --save-dev
Commitizen is now configured and ready to use. Once we finish our changes instead of using git commit we should always use:
npx git-czCommitizen prompt a set of questions, asking the type of change that you’re committing, scope of the change and more. After we finish answering the questions commitizen creates the commit message based upon our answers. lerna can now calculate the next package version based upon our commit messages only. Editing the lerna.json we can include conventionalCommits option to the publish command:
{
  "packages": ["projects/*"],
  "version": "independent",
  "command": {
    "publish": {
      "conventionalCommits": true
    }
  }
}
Sharing versioned libraries between applications implies compiling them into the Angular package format and publish them to an npm registry. We have discussed already how to build Angular libraries now we can focus on how to publish them.
The command responsible for publishing packages in lerna is called lerna publish. The command goes through a series of steps and takes care of the full publishing process. It first creates a new release increasing the version of the packages changed since the last one. Then generates the version tags and lastly, it publish the packages to the npm registry.
Publish operates in each package folder but angular/cli build output for libraries is in the root folder. We need to change the destination folder so that lerna publish can easily find the libraries to publish. The destination folder for the libraries is specified the ng-package.json file and we have to modify the dest folder:
{
  "$schema": "../../node_modules/ng-packagr/ng-package.schema.json",
  "dest": "dist",
  "lib": {
    "entryFile": "src/public-api.ts"
  }
}
To avoid committing build files we can add this line to .gitignore:
**/dist/The last step now is to include some scripts that hooks into the lifecycle of lerna commands.
Using a prepublish script in the root package.json we can trigger the build for all the changed packages. This ensure that the packages built have the correct version in their respective package.json
{
  ...
  "prepublish": "lerna run build --since HEAD~1 --concurrency=1"
  ...
}
We are building here only the packages that changed since the last commit, that’s very useful especially in CI/CD environments if you want to build and publish on each commit incoming. You can modify the —since to your needs following lerna filter options.
Using the flag —concurrency=1 ensure that the packages are correctly built with ngc and respecting the topology.
The script postpublish runs after the lerna publish command and is useful to clean up the library folder after we have published the liraries. We need to include the script in each library package.json:
{
  "name": "first",
  "version": "0.1.0",
  "scripts": {
    "build": "ng build first",
    "postpublish": "rm -rf dist/"
  },
  "peerDependencies": {
    "@angular/common": "^8.2.4",
    "@angular/core": "^8.2.4"
  }
}
Now that we completed all the steps we can build and publish our libraries:
npx lerna run build
npx lerna publish  --contents dist
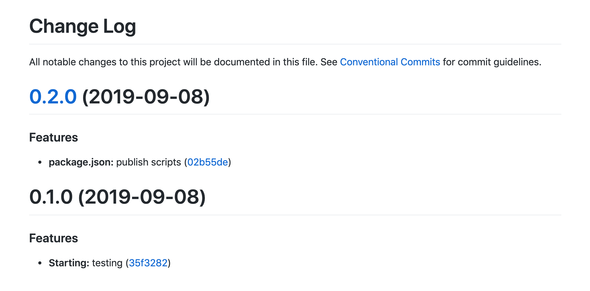
The libraries are all published and ready to be imported into our applications. Thanks to conventional-changelog-angular each package contains a changelog file with all the commits of a version divided by commit type.
Angular provides a comprehensive framework for managing frontend applications making a lot of decisions for us. A codebase, on the other hand, should be tailored to our development needs. Using lerna with the correct tools we can reduce the pain when managing packages and versions.
I’ve left a github repository preconfigured with all the steps of the article https://github.com/izifortune/angular-mono to explore.
Update 09/10/19:
Linked libraries
Working with multiple libraries in a monorepository will eventually require to use and import a library inside another one. If you are following DRY principles you want to reuse a service or a component when and where its needed. Using npm within a lerna monorepository has some limitation that we need to be aware. When you have two linked libraries ng-packagr will not recognise the linked library at build time. Another limitation will be once you start making changes to both of changes to two different libraries at the same time, breaking contracts between them.
In general npm is missing the ability to link together the local libraries while working on a monorepository. Yarn on the other hand, has a feature that covers exactly our needs: workspaces.
Let’s switch to from npm to yarn in our repo making sure to delete the package-lock.json which yarn will replace with yarn.lock. We can also specify to lerna what package manager to use and inform that we will use workspaces inside lerna.json
...
  "packages": [
  "projects/*"
  ],
  "npmClient": "yarn",
  "useWorkspaces": true,
...
We need to locate the workspaces in the project by adding to the package.json:
"workspaces": ["projects/*"]Our libraries will be located in a different folder structure that the one defined by the angular/cli we have to change the mapping declartion paths inside our tsconfig.json
...
"paths": {
   "first": [
     "projects/first/dist"
   ],
   "first/*": [
     "projects/first/dist/*"
   ],
   "second": [
     "projects/second/dist"
   ],
   "second/*": [
     "projects/second/dist/*"
  ],
}
As a general rule of thumb we always specify imported libraries as peerDependencies. This ensure that we are not including the same library multiple times on an application, leaving the latter to add all the libraries as dependencies.
Now that the libraries are linked we need to ensure that the commands order is respected. If we are building library second which depends on library first in the monorepository we need to have first built so that we can consume it. The command lerna run respect the topological libraries sorting but it won’t work with peerDependencies. We have to switch then to devDependencies so that lerna can understand that correct order of execution.
  "devDependencies": {
     "first": "*"
   }
I added a third library on the example repository linked to demonstrate how the linking will work here
** Update 29/01/21 **
When working linking locally the packages in the monorepo in another Angular application remember to add the flag preserveSymlinks: true in both tsconfig.json and angular.json as follows:
// tsconfig.json
"compilerOptions": {
  "preserveSymlinks": true
// angular.json
"projects": {
...
"architect": {
"build": {
...
"options": {
"preserveSymlinks": true,
...

